Table of Contents
M2000
How do I install Windows Media Center on the M2000?
Before installation of Windows MCE, please:
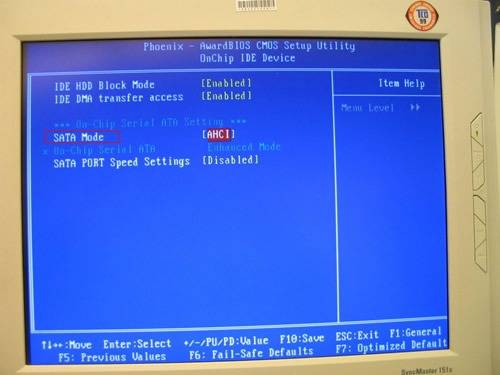
- Check the SATA mode function in the BIOS. If there is no such function, please update your BIOS according to the Shuttle website.
- Download the relevant chipset driver from the Shuttle website.
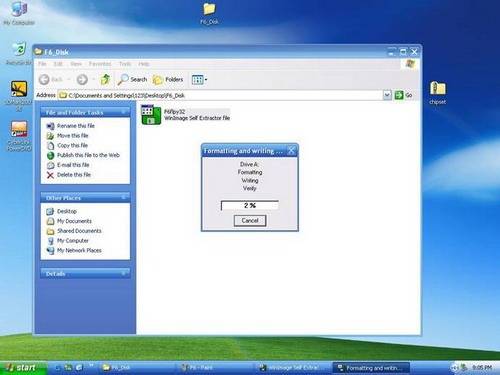
- Unzip the chipset driver package and separate the F6 Disk Driver. Now enter the F6_Disk folder and doubleclick
F6flpy32.exeto create an “F6 driver installation disk” with a blank floppy disk.
- Also prepare a USB pen drive to install the AHCI Driver on the M2000.
Start Windows MCE installation:
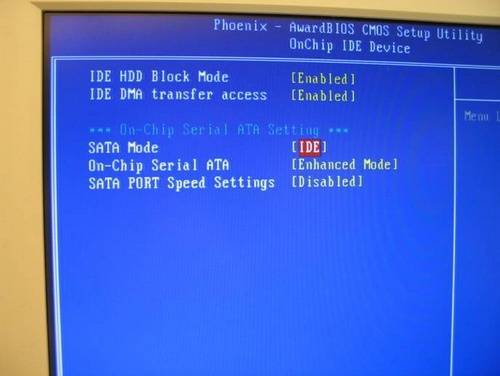
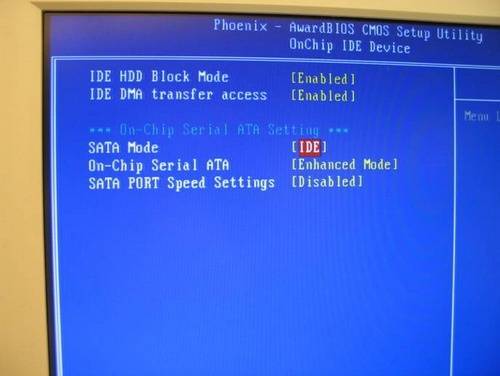
- Go to the BIOS setup page and change the SATA Mode from
AHCItoIDEIntegrated Peripherals
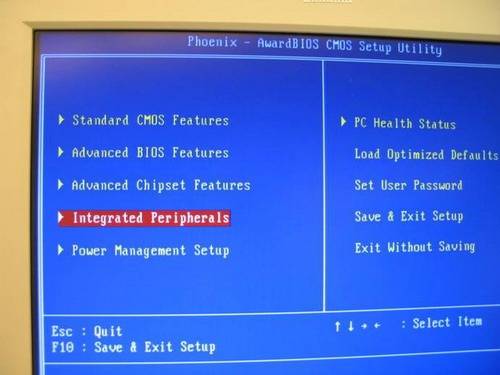
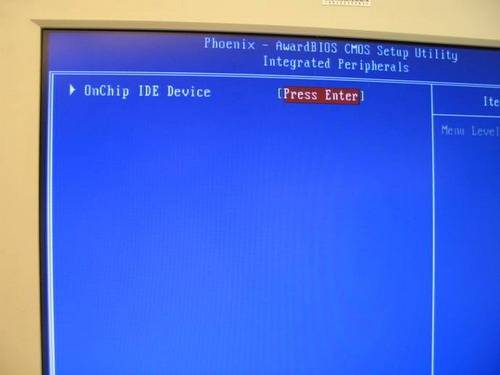
- Enter
OnChip IDE Device
- Change to
IDEmode.
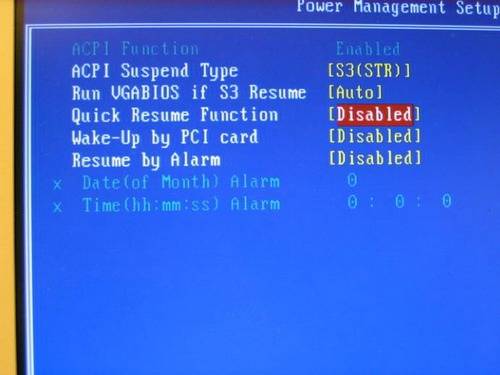
- Go to the BIOS setup page and under Quick Resume Function change from
EnabletoDisable.Power Management Setup
- Change function to
Disable.
- Install Windows MCE from CD, and do not press
F6function key when the RAID setup message comes up. - When the Windows installation is completed, please install the chipset driver and reboot the system.
- Install the F6 Disk Driver from the floppy disk manually.
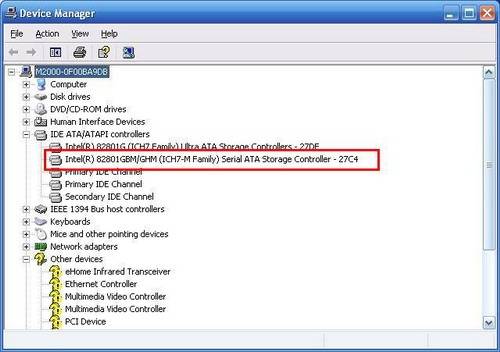
- After installation of the chipset driver, please enter
IDE ATA/ATAPI Controllersin the Device Manager, it should showIntel 82801GBM/GHM (ICH7 Family) Serial ATA Storage Controller – 27C4.
- Now plug in the USB floppy disk drive with the disk containing the F6 Disk Driver. Now rightclick on
Intel 82801GBM/GHM (ICH7 Family) Serial ATA Storage Controller – 27C4, selectupdate driverand do not connect to Windows Update to search for software.
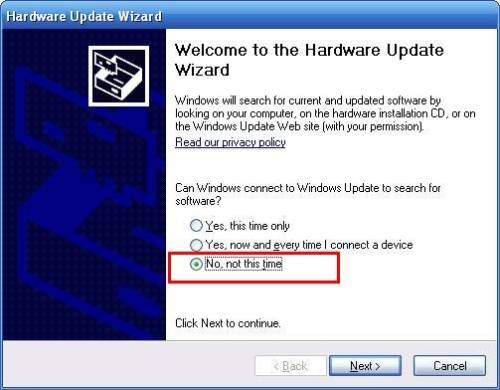
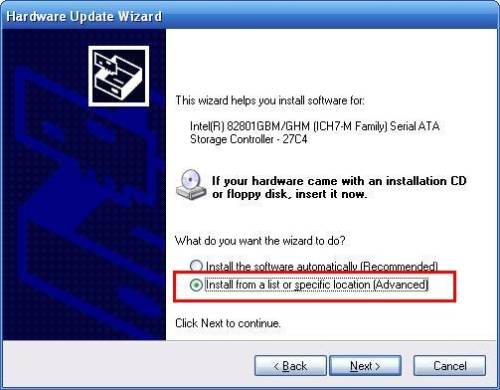
- Select
install from a list or specific location [Advanced]
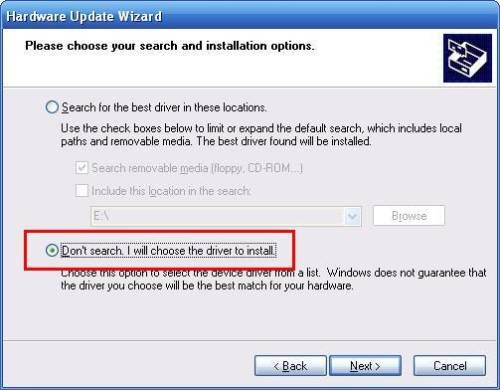
- Select
Don’t search. I will choose the driver to install.
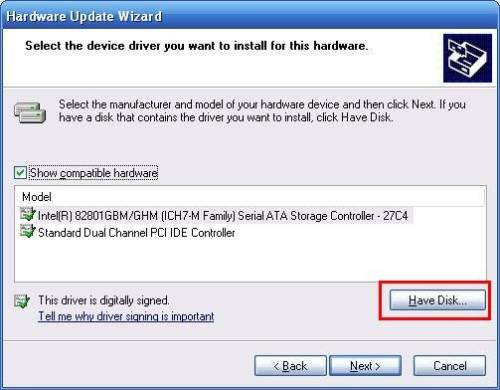
- Click
Have disk
- Click
OKto load AHCI Driver from the FDD.

- Finally select
Intel 82801GBM SATA AHCI Controllerfrom the USB floppy disk drive to install the AHCI driver.
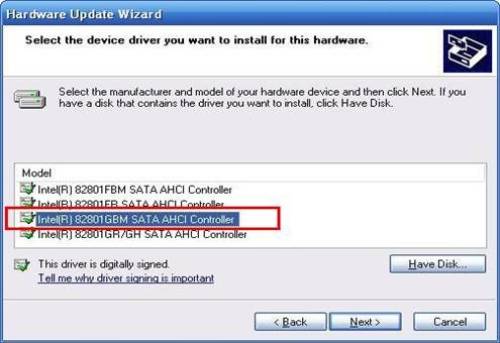
- After the installation is completed, please restart the system.
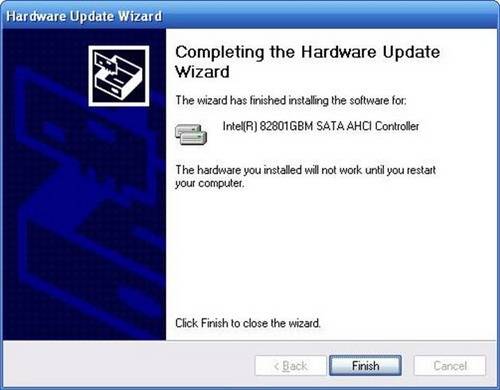
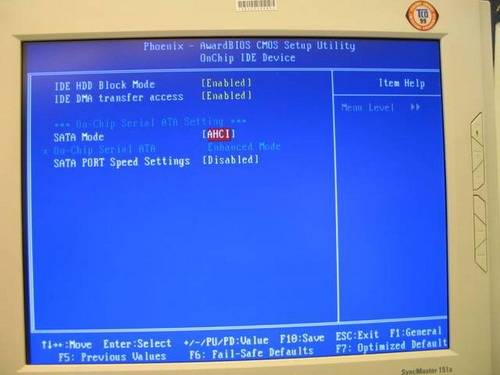
- Go to BIOS setup page, change SATA Mode from
IDE modetoAHCI Mode.
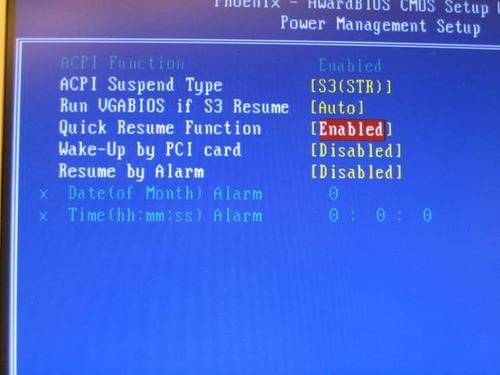
- Go to BIOS setup page, change Quick Resume Function from
DisabletoEnable.
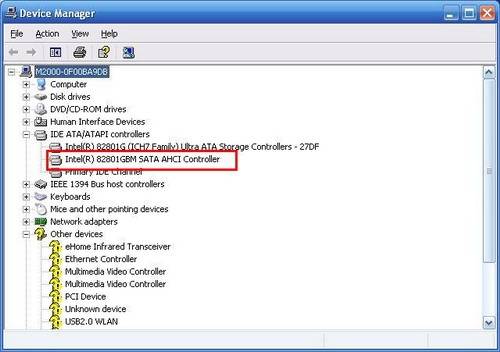
- Enter the Device Manager and select
IDE ATA/ATAPI Controllers. It should now showIntel 82801GBM SATA AHCI Controller.
- Congratulations!