Table of Contents
ST20G5
POST issue on Shuttle G5 models - check setting of jumper JP4.
- Most of the time when your system won't post it is because the J4 jumper pins are loose and losing connection to the motherboard. This means, when you turn on your computer it won't show anything on the screen, known as the No-Post issue.
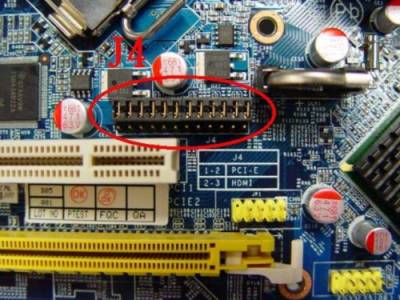
- To fix this, please unplug the power cord first, then open the case and remove jumper J4 from the motherboard and put it back in place upside down.
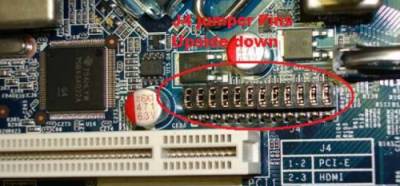
- Now please restart the computer and the BIOS screen should appear.
G-Series
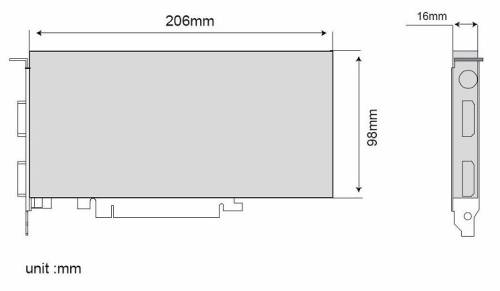
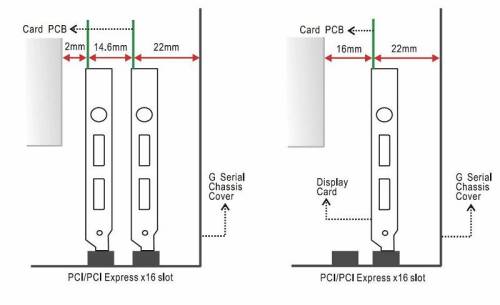
The maximum size of a card that fits in the G-Series is 206 mm (L) × 98 mm (H) × 16 mm (D). But due to the different layout designs of each model and VGA card, we strongly suggest to check our VGA support list for each model or test before purchasing the VGA card.
Windows 2000 and XP installation on a Serial ATA(SATA)/RAID Hard Drive
To install an Windows 2000 or XP on a SATA/RAID hard drive, a floppy drive (or USB floppy drive) and floppy disk with the correct RAID drivers are essential.
The RAID floppy disk comes bundled in the accessory package. If the RAID floppy disk is missing, the steps below will help to create another substitute disk. (Those procedures will need to be done on other system):
- Insert the motherboard driver CD into your CD-ROM. Copy all files in RAID directory
D:\ULi\South_driver\SATA50XX_Raid_FDDto a blank floppy disk. (Current CD driver is in Drive D) or download the files here and extract them to a blank floppy disk.
Note: Windows 2000 and XP installation on a Serial ATA(SATA) HD requires RAID driver. Repeat, you must install RAID driver if you like to use Serial ATA(SATA) Hard Drive. - Installation in SATA mode:
- The following procedure outlines the important steps in installing Windows on a Serial ATA drive. Before you begin, please make sure the RAID driver disk is inserted in the floppy drive, and the floppy drive is connected to the computer.
- Installing Windows (Please refer to the ULi RAID manual P13.)
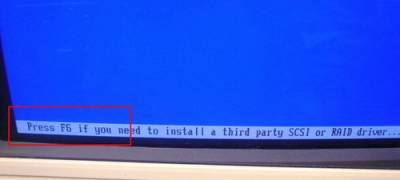
- Press
F6function key when RAID setup message string come up.
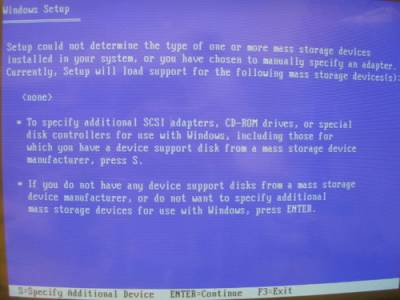
- Press
Skey to select RAID driver.
Note: You must install RAID DRIVERS for SATA HD. Please follow the procedure below carefully to ensure successful RAID installation.

- Press “Enter” to select the
ULi SATA Controller(M5287, Windows XP/Server 2003). - The following Windows Setup screen appears listing the drivers that you choose.
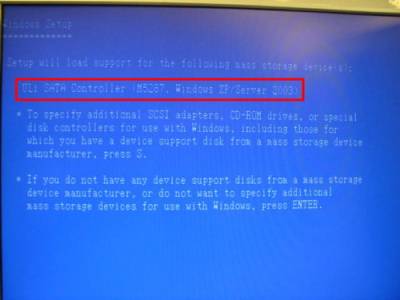
- After the drivers are selected, press Enter to continue installing Windows.
- Installation in RAID mode:
- Pre-installation setup for RAID mode.
- In BIOS you will need to enable RAID functionality.
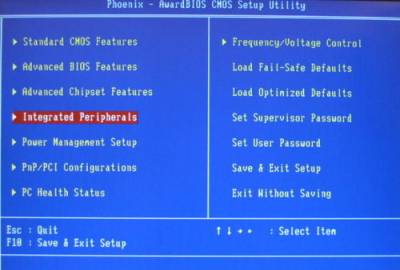
- Enter
Integrated Peripherals

- Enter
South Configuration

- Enable
Serial ATA RAID Mode, pressF10to save the configuration and exit.
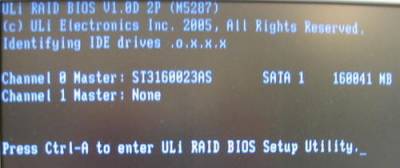
- Press
Ctrl-Ato enterULi RAID BIOS Setup Utilityand select the drives that you wish to use in a RAID array. (Please refer to the ULi RAID manual P3). - Installing Windows
- The following procedure outlines the important steps in installing Windows on a RAID drive. Before you begin, please make sure the RAID driver disk is inserted in the floppy drive, and the floppy drive is connected to the computer.
- Installing Windows (Please refer to the ULi RAID manual P13)
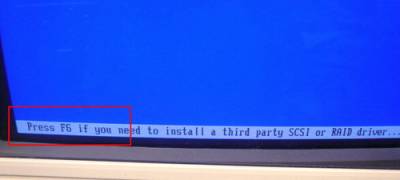
- Press
F6function key when RAID setup message string come up.
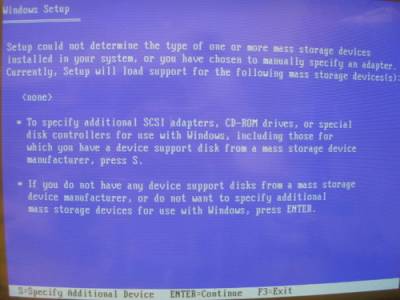
- Press
Skey to select RAID driver.

- Press “Enter” to select the
ULi SATA Controller(M5287, Windows XP/Server 2003). - The following Windows Setup screen appears listing the drivers that you choose.
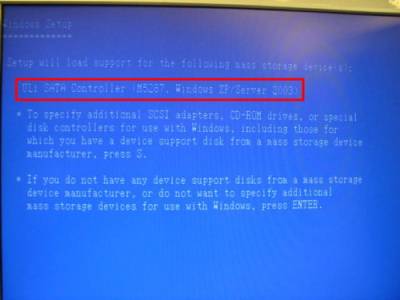
- After the drivers are selected, press Enter to continue installing Windows.