This is an old revision of the document!
SG77G5
SG33G5
G-Series
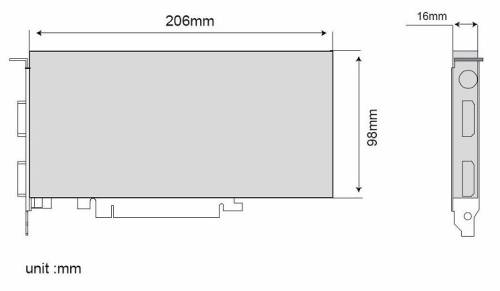
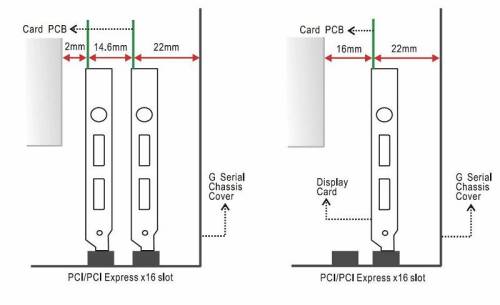
The maximum size of a card that fits in the G-Series is 206 mm (L) × 98 mm (H) × 16 mm (D). But due to the different layout designs of each model and VGA card, we strongly suggest to check our VGA support list for each model or test before purchasing the VGA card.
Why does the SB77G5 sometimes hang upon reboot?
This may be caused by an incorrect LAN firmware and chipset version. Please install the “Broadcom Advanced Control Suite” from your driver CD. You can check, if the versions match.
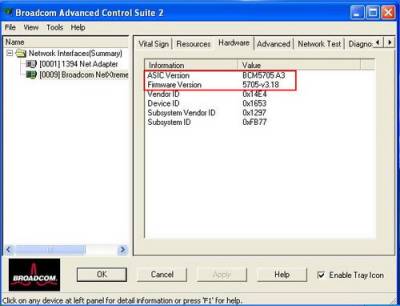
If the ASIC Version is BCM5705 A3 and Firmware Version is 5788, please follow the procedures below:
- Prepare a boot disk, download this patch and unzip the files on a disk.
- Shut down the SB77G5 and unplug the power cord for 30 seconds.
- Boot the system with this boot disk and enter 5705.
Please note: This procedure only works if the ASIC version is 5705 and the Firmware version 5788.
How do I install RAID drivers on the SB77G5 during Windows 2000 or Windows XP installation?
In order to install Windows 2000 or Windows XP RAID drivers on the SB77G5, a floppy drive and floppy disk with the RAID driver is required.
Before you start you will need to create an Intel RAID Driver Floppy Disk (create an Intel RAID Driver Floppy Disk or download the driver from here and extract/UnZip on a Floppy Disk directly): If you have the “Intel RAID Driver” disk from your XPC accessory box, skip this step.
- On a system running Windows, insert motherboard driver CD.
- Insert a blank floppy disk into the floppy drive.
- Doubleclick on the D:\Intel\Raid\F6 install\F6 install.exe and answer all prompts presented (assuming your CD-ROM drives letter is D.)
- When the installation is completed, your floppy disk should contain the following files: iaStor.cat, iaStor.inf, iaStor.cat, License.txt, readme.txt and TXTSETUP.oem.
- Go into the BIOS setup and enable Drive A and Onboard FDC Controller.
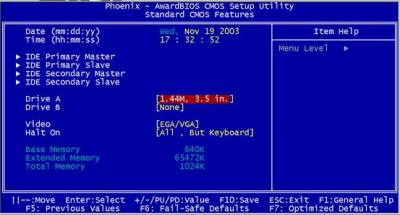
- Enable Drive A.
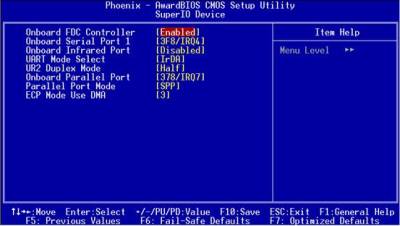
- Enable Onboard FDC Controller.
- Begin the Windows installation.
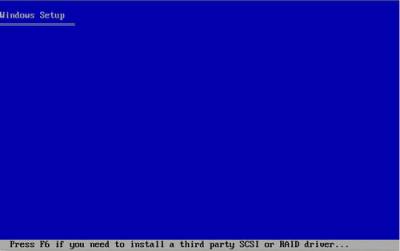
- Press the F6 key when the RAID setup message comes up.
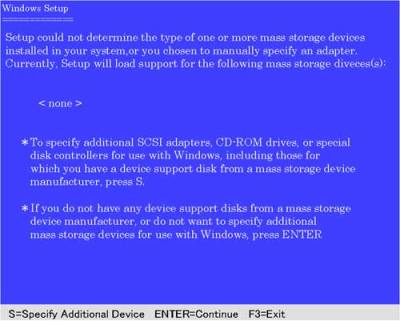
- Press the S key to select the RAID driver.
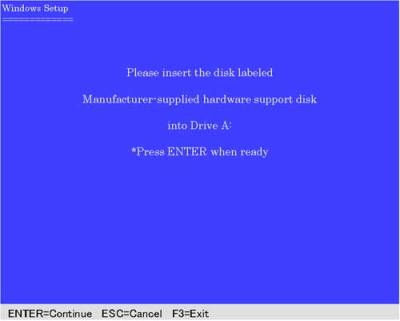
- Insert the floppy disk you just made into the floppy disk drive.
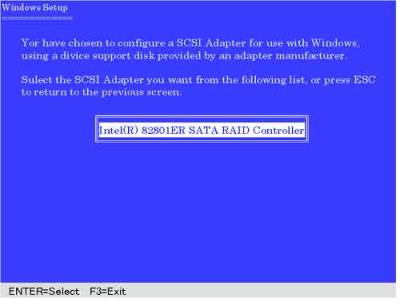
- Select the relevant driver for your operating system.
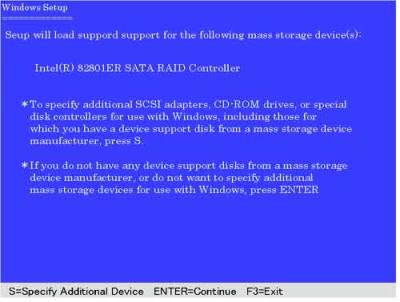
- Once the driver is installed, press enter to continue the Windows installation.