This is an old revision of the document!
DH310
RS232/422/485 Assignment
| RS-232 | RS-422 | RS-485 | ||
|---|---|---|---|---|
 | PIN | COM | COM | COM |
| 1 | DCD1# | 422 TX - | 485 - | |
| 2 | SIN1 | 422 TX + | 485 + | |
| 3 | SOUT1 | 422 RX - | ||
| 4 | DTR1 | 422 RX + | ||
| 5 | GND | |||
| 6 | DSR1# | |||
| 7 | RTS1 | |||
| 8 | CTS1# | |||
| 9 | RI1# |
Why do I have no video output on my Intel 3xx series chipset product?
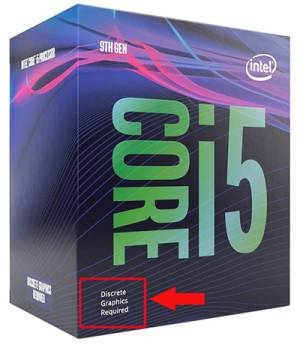
Since the introduction of Intel's 9th generation processor family (Coffee Lake Refresh), some of the new 9th-gen processor models no longer have integrated graphics, namely the “F” models like, for example, the i5-9400F. To operate a system with these processor models, a discrete graphics card is required. These processor models are compatible to Shuttle XPC cube series with a free PCIe-x16 slot only. The Shuttle XPC slim series which uses integrated Intel CPU graphics, won't be able to run those processor models.
This information can also be found on the packaging of an Intel boxed processor:
For reference, please see the full list of Intel's 9th-gen desktop processors here: https://ark.intel.com/products/codename/97787/Coffee-Lake#@desktop
To learn more on which processor is compatible with your Shuttle XPC, please refer to our support list of the relevant XPC model: https://global.shuttle.com/support/supportList
Where is COM port #1?
The first COM port is marked on this photo:

My DH310 does not show a picture with an Intel 9xxx CPU (Coffee Lake Refresh) installed. What can I do?
In case your DH310 does not boot with an Intel 9xxx CPU installed, please follow the procedure below.
The system does basically support 9xxx processors, however due to different graphics chips, the BIOS needs to be updated to get a picture. The following procedure explains how to “blind flash” the system without an initial monitor signal.
 Please note: You WILL NOT have to install a previous-generation processor to perform the update!
BIOS Download: http://global.shuttle.com/products/productsDownload?productId=2261 (choose version DH310000.104 or later)
- USB Drive preparation:
- Format a USB drive in FAT32
- Copy the BIOS files to the Root Directory of your USB drive

- Flash Process
- Install the processor and memory in your DH310 (No HDD or other components!).
- Apply power, HDMI/DP and a USB keyboard.
- Connect the USB Stick you just prepared to any USB port.
- Power-on the system.
- WAIT for about 2 minutes. The machine will flash in background with no screen prompt. Please DO NOT power-off the system or press any key!
- After 2 minutes the following screen should appear.

- Remove the USB drive and press F1 to continue.
- Finish