This is an old revision of the document!
Maintenance-related FAQs
How do I clean a Shuttle XPC all-in-one?
Proceed as follows to clean the device:
- First switch off the device and unplug the DC power cord.
- Use a soft, lint-free cloth for cleaning; a clean microfibre cloth is ideal.
- A dry cloth is generally sufficient.
- To achieve a better cleaning effect, the cloth can be slightly wet with water.
- For disinfection, a cleaning agent containing alcohol (max. 75%) may be used.
- Never spray cleaning agent directly onto the monitor, but just onto the cloth.
- Sweep the cloth carefully across the monitor from top to bottom.
- If you have dampened the cloth slightly, you should then use a second soft and dry cloth to reliably remove all moisture.
- The best way to clean crevices, corners or sockets is to use a soft brush carefully.
- When you do this, hold the brush as upright as possible so that only the bristles of the brush touch the device and the surround of the bristles cannot scratch the surface.
- If dust accumulates in the ventilation slots, it should be sucked out using a brush attachment.
- When you do this, make sure that the vacuum cleaner attachment does not touch the device.
Important warnings:
Do not use any cleaning agents that are not suitable for LCDs. To do this, check the product specifications.
Avoid the following cleaning agents, because they may damage the monitor and chassis:
- Agents which contain solvents, for example gasoline, acetone, paint thinner
- Agents which contain acid, for example vinegar or citric acid
- Agents which contain abrasive particles
- Car care products such as car polish or car wax
Caution: The openings at the side and rear are not protected against dust or moisture.
Current Shuttle all-in-one PCs (XPC all-in-one X50 series from V4, P20U, P90U, P51U) are protected according to the IP54 standard.
Bear in mind that the IP54 certification only applies to the front of the device:
- In relation to solids: Protected to a limited extent against the ingress of dust
- In relation to liquids: Protection against any splashing water, protected to a limited extent against the ingress of moisture
CMOS Battery Information
What is CMOS?
CMOS is a physical part of the mainboard, a memory that stores the BIOS/EFI settings.
Why does the CMOS needs a battery?
Without energy, the CMOS resets and loses all settings. The small battery acts as backup and keeps it powered. CMOS batteries are attached directly to the mainboard and can power the CMOS for years.
When you power on your PC and receive a message like “CMOS Checksum Error”, the CMOS battery needs to be replaced.
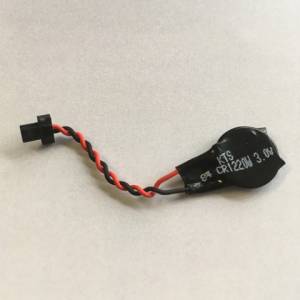
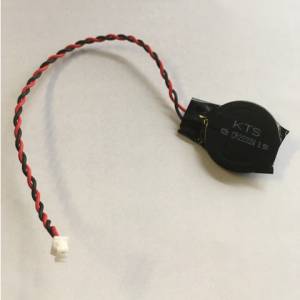
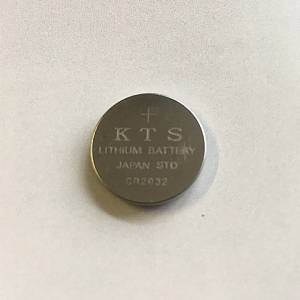
Which battery is being used?
There are three sorts of batteries.
| Coin cell CR1220 (3V) with wire | Lithium coin cell CR2032 (3V) with wire | Lithium coin cell CR2032 (3V) |
|---|---|---|
 |  |  |
Use the pagination buttons at the end of the table ↓ or enter a model name in the search box on the right: →
| Coin cell CR1220 (3V) with wire | Lithium coin cell CR2032 (3V) with wire | Lithium coin cell CR2032 (3V) |
|---|---|---|
| NC01U | DH02U | D10 |
| NC01U3 | DH02U5 | D1416S |
| NC01U5 | DH110 | K45 |
| NC01U7 | DH110SE | K48 |
| NS01A | DH170 | NS02A |
| DH270 | NS02E | |
| DH310 | P20U | |
| DH370 | P90U | |
| DL10J | SA67G2 | |
| DQ170 | SA76R4 | |
| DS10U | SB51G | |
| DS10U3 | SB52G2 | |
| DS10U5 | SB61G2 | |
| DS10U7 | SB65G2 | |
| DS437 | SB75G2 | |
| DS437T | SB77G5 | |
| DS47 | SB81P | |
| DS57U | SB83G2 | |
| DS57U3 | SB83G5 | |
| DS57U5 | SB83G5M | |
| DS57U7 | SB86i | |
| DS61 | SB87G5 | |
| DS67U | SB95P | |
| DS67U3 | SD11G5 | |
| DS67U5 | SD30G2 | |
| DS67U7 | SD30G2 Plus | |
| DS68U | SD31P | |
| DS68U3 | SD32G2 | |
| DS77U | SD32G5 | |
| DS77U3 | SD36G5 | |
| DS77U5 | SD36G5M | |
| DS77U7 | SD37P2 | |
| DS81 | SD39P2 | |
| DS81L | SG31G2 | |
| DS87 | SG31G2V2 | |
| DX30 | SG31G5 | |
| EN01J3 | SG31G5V2 | |
| EN01J4 | SG33G5 | |
| NC02U | SG33G5M | |
| NC02U3 | SG33G5M Deluxe | |
| NC02U5 | SG33G6 Deluxe | |
| NC02U7 | SG41J1 | |
| NC03U | SG41J1 Plus | |
| NC03U3 | SG41J4 | |
| NC03U5 | SG41R4 | |
| NC03U7 | SG45H7 | |
| NC10U | SH110R4 | |
| NC10U3 | SH170R6 | |
| NC10U5 | SH310R4 | |
| NC10U7 | SH370R6 | |
| P51U | SH370R6 Plus | |
| P51U3 | SH370R8 | |
| X70M | SH55J2 | |
| X70S | SH61R4 | |
| XC60J | SH67H3 | |
| XH110 | SH67H7 | |
| XH110G | SH81R4 | |
| XH110V | SH87R6 | |
| XH170V | SH97R6 | |
| XH270 | SH97R8 | |
| XH310 | SK21G | |
| XH310 | SK22G2 | |
| XH310R | SK43G | |
| XH310RV | SK83G | |
| XH310V | SN21G5 | |
| XH310V | SN25P | |
| XH61 | SN26P | |
| XH61V | SN27P2 | |
| XS35 | SN41G2 | |
| XS35GT | SN41G2V2 | |
| XS35GTV2 | SN41G2V3 | |
| XS35V2 | SN45G | |
| XS35V3 | SN67H3 | |
| XS35V3L | SN68PTG5 | |
| XS35V4 | SN68PTG6 Deluxe | |
| XS35V5 | SN68SG2 | |
| XS36V | SN78SH7 | |
| XS36V4 | SN85G4 | |
| XS36V5 | SN95G5 | |
| XS36VL | SP35P2 | |
| SP35P2 Pro | ||
| SP45H7 | ||
| SS21T | ||
| SS30G2 | ||
| SS31T | ||
| SS50 | ||
| SS51G | ||
| SS56G | ||
| SS56L | ||
| SS58G2 | ||
| SS58G2SE | ||
| SS59G | ||
| ST20G5 | ||
| ST61G4 | ||
| ST62K | ||
| SV24 | ||
| SX38P2 Pro | ||
| SX48P2 | ||
| SX58H7 | ||
| SX58H7 Pro | ||
| SX58J3 | ||
| SX79R5 | ||
| SZ170R6 | ||
| SZ170R8 | ||
| SZ270R8 | ||
| SZ270R9 | ||
| SZ68R5 | ||
| SZ77R5 | ||
| SZ87R6 | ||
| X27 | ||
| X27D | ||
| X50V2 | ||
| X50V2 Plus | ||
| X50V3 | ||
| X50V3L | ||
| X50V4 | ||
| X50V5 | ||
| X50V5U3 | ||
| X50V6 | ||
| X50V6U3 | ||
| X50V7 | ||
| X50V7U3 | ||
| XG41 | ||
| XH81 | ||
| XH81V | ||
| XH97V |
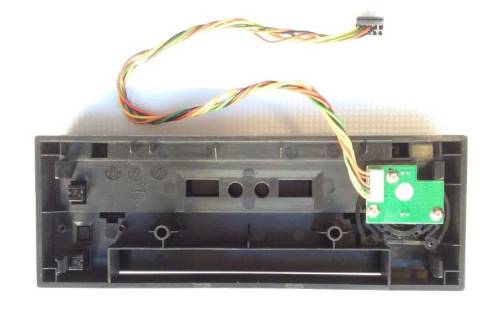
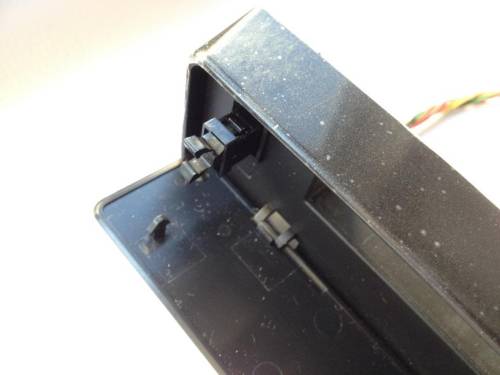
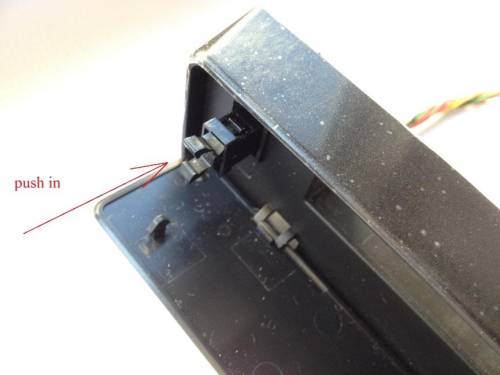
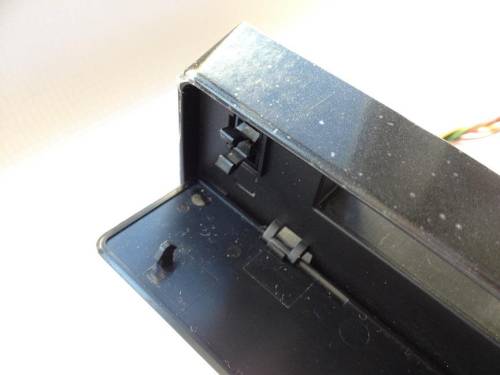
Instructions for changing the snap lock
In case the snap lock at the front panel of your Shuttle PC gets broken, follow these steps to replace it with a new one.
- Release the front panel from the case by pressing the four clips lightly.
- Use a pair of tweezers to remove the snap lock from the panel.
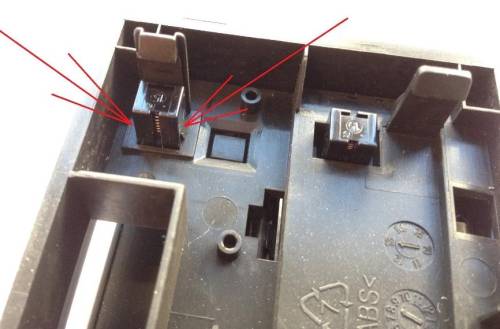
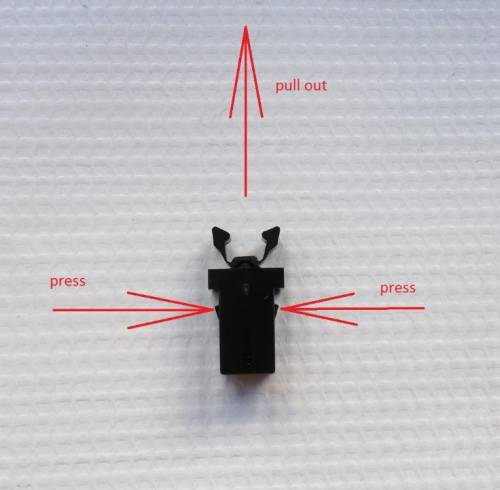
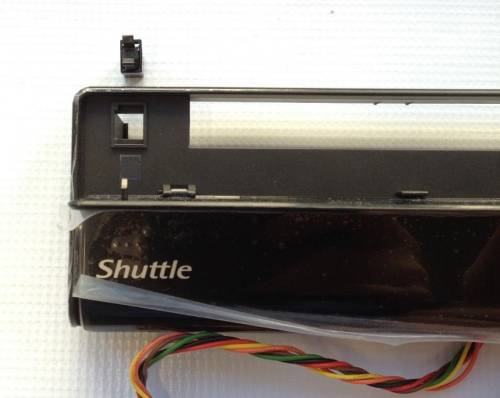
- Insert a new snap lock.
Will my Shuttle XPC still run stable, if its case cover is taken off?
Due to the XPC's small footprint design, the thermal dynamics are very different from the ones of a regular full-size PC. Whilst normal PCs may run cooler with the case cover taken off, an XPC has strikingly unique properties.
Our design team has carefully considered and tested the thermal properties of an open-case XPC. Contrary to popular beliefs, the CPU, hard drive(s) and mainboard temperatures are higher when the case cover is taken off. Opening the case actually reduces the airflow through the case. The vents at the front of an XPC no longer take air in; therefore, the airflow around the PWM and MOSFET is significantly lower.
We strongly recommend to leave the aluminium case cover on when the XPC is in operation. Not only will this improve the thermal dynamics of your XPC, it looks stunning as well!