Power Supply-related FAQ
Which models support 12 Volt power input?
| Category | Model | 12 Volt1) | 19 Volt2) | Power Adapter |
|---|---|---|---|---|
| XPC slim | DH02U | ✘ | ✔ | 120 W |
| DH02U5 | ||||
| DH110 | ✔ | ✔ | 90 W | |
| DH110SE | ✘ | ✔ | ||
| DH170 | ✘ | ✔ | 90 W | |
| DH270 | ✔ | ✔ | 90 W | |
| DH310 | ✔ | ✔ | 90 W | |
| DH310S | ✘ | ✔ | 90 W | |
| DH310V2 | ✔ | ✔ | 90 W | |
| DH370 | ✘ | ✔ | 90 W | |
| DH410 | ✔ | ✔ | 90 W | |
| DH410S | ✘ | ✔ | 90 W | |
| DH470 | ||||
| DX30 | ✔ | ✔ | 40 W | |
| DL10J | ✔ | ✔ | 40 W | |
| DS10U | ✔ | ✔ | 65 W | |
| DS10U3 | ||||
| DS10U5 | ||||
| DS10U7 | ||||
| DS57U | ✔ | ✔ | 65 W | |
| DS57U3 | ||||
| DS57U5 | ||||
| DS57U7 | ||||
| DS67U | ✔ | ✔ | 65 W | |
| DS67U3 | ||||
| DS67U5 | ||||
| DS67U7 | ||||
| DS68U | ✔ | ✔ | 65 W | |
| DS77U | ✔ | ✔ | 65 W | |
| DS77U3 | ||||
| DS77U5 | ||||
| DS77U7 | ||||
| DS81 | ✘ | ✔ | 90 W | |
| DS81L | ✔ | ✘ | 90 W | |
| DS87 | ✘ | ✔ | 90 W | |
| DQ170 | ✘ | ✔ | 90 W | |
| XC60J | ✔ | ✔ | 65 W | |
| XH81 | ✘ | ✔ | 90 W | |
| XH81V | ||||
| XH97V | ✘ | ✔ | 90 W | |
| XH110 | ✔ | ✔ | 90 W | |
| XH110V | ||||
| XH110G | ✘ | ✔ | 180 W | |
| XH170V | ✘ | ✔ | 90 W | |
| XH270 | ✘ | ✔ | 120 W | |
| XH310 | ✔ | ✔ | 90 W | |
| XH310R | ||||
| XH310RV | ||||
| XH310V | ||||
| XH410G | ✘ | ✔ | 180 W | |
| XS35 series | ✘ | ✔ | 40 W | |
| XS36 series | ||||
| XPC all-in-one | X50 | ✘ | ✔ | 65 W |
| X50V2 | 40 W | |||
| X50V2 Plus | ||||
| X50V3 | ||||
| X50V3L | ||||
| X50V4 | 65 W | |||
| X50V5 | ✔ | ✔ | 65 W | |
| X50V6 | ||||
| X50V6U3 | ||||
| X50V7 | ||||
| X50V7U3 | ||||
| P20U | ✔ | ✔ | 65 W | |
| P51U | ✔ | ✔ | 65 W | |
| P90U | ||||
| P90U3 | ||||
| P90U5 |
DC Connector: 5.5/2.5 mm (outer/inner diameter)
Maximum current of the external power adapter
| Output Wattage | 12 Volt | 19 Volt |
|---|---|---|
| 40 W | 3.33 A | 2.1 A |
| 65 W | 5.42 A | 3.42 A |
| 90 W | 7.5 A | 4.47 A |
| 120 W | 6.31 A | |
| 180 W | 9.5 A |
Power supply compatibility list
| Power Supply Model | Remark | Watt | Compatible with: |
|---|---|---|---|
| PC30 | 200 | SS40G, SS50C, SS51G, SB51G, SK41G, SB52G, SK43G, SN41G2, SN45G, SS56G(V2/V3) | |
| PC32 | 180 | ST62K | |
| PC34 | 220 | SB61G2, SB62G2, SB65G2, SB75G2(S) | |
| PC35 | 240 | SN84G4(V2/V3), SK83G, ST20G5, SN95G5 V2, SS56L, SS30G2 | |
| PC36 | 100 | K45, K48, D10, D1416 | |
| PC40 | 250 | D10/D1416/K45/K48 (need extender cable), SA76G2, SB51G, SB52G2, SB61G2, SB62G2, SB65G2, SB75G2, SB77G5, SB83G5, SB87G5, SD30G2, SD30G2P, SD32G2, SD36G5, SD36G5M, SG31G2 V1, SG31G2 V2, SG33G5, SG33G5 Pro, SG33G5M, SG33G5M Deluxe, SG33G6 Deluxe, SG41J1 V1 (needs extender cable), SK21G, SK22G2 V2, SK41G, SK43G, SN21G5, SN41G2, SN45G, SN68PTG5, SN68PTG6 Deluxe, SN68SG2, SS40G, SS51G, SS56G, SS58G2, SS59G, ST61G4 | |
| PC-41 | short 4-pin power cable | 250 | |
| PC-41J | long 4-pin power cable | 250 | SG41J1, SG41J4, SH61R4 |
| PC50 | 300 | D10/D1416/K45/K48 (need extender cable), SA76G2, SB51G, SB52G2, SB61G2, SB62G2, SB65G2, SB75G2, SB77G5, SB83G5, SB87G5, SD30G2, SD30G2P, SD32G2, SD36G5, SD36G5M, SG31G2 V1, SG31G2 V2, SG33G5, SG33G5 Pro, SG33G5M, SG33G5M Deluxe, SG33G6 Deluxe, SG41J1 V1 (needs extender cable), SK21G, SK22G2 V2, SK41G, SK43G, SN21G5, SN41G2, SN45G, SN68PTG5, SN68PTG6 Deluxe, SN68SG2, SS40G, SS50C, SS51G, SS56G, SS58G2, SS59G, ST61G4 | |
| PC60 | 300 | D10, D1416, K45, K48, SA76G2, SB51G, SB52G2, SB61G2, SB62G2, SB65G2, SB75G2, SB77G5, SB83G5, SB87G5, SD30G2, SD30G2P, SD32G2, SD36G5, SD36G5M, SG31G2 V1, SG31G2 V2, SG33G5, SG33G5 Pro, SG33G5M, SG33G5M Deluxe, SG33G6 Deluxe, SG41J1 V1 (needs extender cable), SK21G, SK22G2 V2, SK41G, SK43G, SN21G5, SN41G2, SN45G, SN68PTG5, SN68PTG6 Deluxe, SN68SG2, SS40G, SS51G, SS56G, SS58G2, SS59G, ST61G4 | |
| PC55 | 8/6-pin | 450 | SB81P, SB95P, SB95P V2, SD31P, SD37P2, SD39P2, SN25P, SN26P, SN27P2 |
| PC61 | 300 | SG45H7, SN78SH7, SP45H7, SX58H7 | |
| PC62 | 220 | Works with G2/G5/G5M/G6 Series and ST61G4 but not with SD11G5, SS58G2, SK83G, SN85G4, SN95G5 and ST20G5 | |
| PC63 | 500 | SG45H7, SN78SH7, SP45H7, SX58H7 | |
| PC70 | 24/4-pin | 400 | SP35P2 Pro, SP35P2 V2 |
| PC71 | 24/4-pin | 450 | SX38P2 Pro, SX48P2 E, SX48P2 Deluxe |
| PC80 | external | 60 | X27, X27D |
| PC85-65W | external | 65 | X50 V1 |
| PC85-40W | external | 40 | X50V2 |
| PS180 | external | 180 | ST62K |
| PS200A | 200 | SS51G, SS51G1 | |
| PS220 | external | 220 | SD11G5 |
| PS240H | 240 | SK22G2B V1, SN85G4, SN95G5, SS30G2B | |
| PS250T | 250 | SS21T, SS31T | |
| PS275EH | 275 | SB86I | |
| PS350/PC43 | 350 | SB81P, SB95P, SD31P, SN25P, SN26P, SN27P2, SD37P2 | |
| PS350H | 350 | SD31P | |
| PS400WH | 400 | SB81P, SB95P, SD31P, SN25P, SN26P, SN27P2, SD37P2 | |
How to do the power supply paper clip test?
There are various reasons why a computer will shut down. Chief among these is component overheating. The most common cause of computer overheating is a fan going bad and failing to cool down a component. Most computers have power supplies similar to this one:
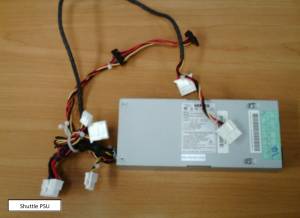
When a PSU fan goes bad, it is not able to cool down the power supply hence the device will heat up. The excess heat generated by the PSU will add to the overall temperature of the system unit. If this failure is not corrected, the PSU will be damaged. A damaged PSU can, potentially, damage the components as well as the motherboard itself.
If your system appears to be exhibiting an abnormally high temperature and you suspect that the PSU's fan has gone bad but are not sure, there is a test you can perform which should prove weather the fan is working or not. This test is called “The PSU Paper Clip Test.”
First of all, we need to identify the main power connectors that run from the PSU and attach to the motherboard to supply voltage and current that your motherboard and its components need. Most power supplies have a 20- or 24-pin ATX Connector like the one shown in the picture on the left and a 4-pin ATX Connector like the one shown in the picture on the right:

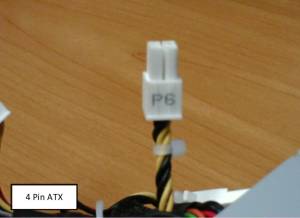
These connectors are needed by your motherboard in order to function properly. As mentioned above, they supply the proper voltages and currents that the various components attached to the motherboard need in order to work properly. These components include the motherboard itself, the CPU, the memory modules, the hard drive and the optical drive as well as any video cards that your system may use.
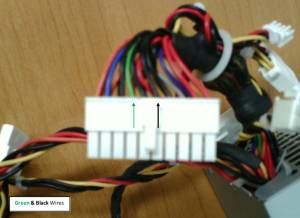
To perform the PSU Paper Clip test, we’ll need to examine the power supply connectors closely and find the one that has a lone green wire. By ninety nine percent, this green wire is located on pin 14 on the bigger connector. In addition to the green wire, we locate the other black wires that are present in the connector. Here’s an image of the wires in question:
Once the wires are located, we will need a paper clip such as the one shown here:
Now it is time for the fun part. First we need to reshape the paper clip so it takes shape similar to the letter C as follows:

Once this is done, we need to make sure that the power cord is NOT connected to the power supply. Then we need to connect one end of the paper clip to the green wire and the other end to one of the black wires present on the connector as shown below:
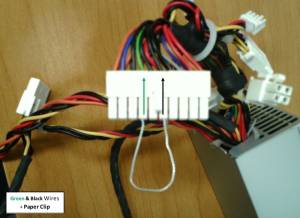
Once the paper clip is attached to the green and black wires, this will enable the power supply to turn on while it is disconnected from the motherboard. After this is done, we are turning off the power switch, if one is present, and connect the power cord to the PSU as shown below:
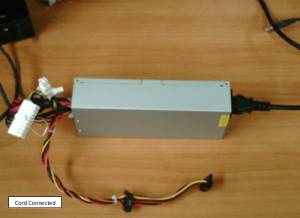
If the PSU does not have such a switch, then as soon as the power cord is connected, power should run through the PSU and we can observe the fan on the power supply to see, if it spins as shown in the image as follows:
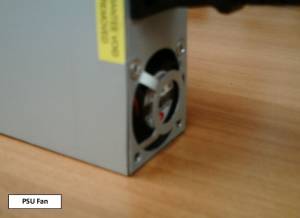
If the fan spins, this at least means the PSU puts out voltage and overheating might not be the case. If, on the other hand, the fan does not spin, overheating is mostly likely present and the PSU is soon to fail and possibly damage other components in the system. This test works in ninety nine percent of the cases. If you want to be entirely sure of the power supply’s functionality, we suggest you purchase a power supply tester. This will give you more accurate results then the PSU paper clip test.