DH110SE
How to create a bootable Windows 7 USB flash drive and integrate the USB 3.0 drivers.
Platforms with Intel Braswell-SoC or Series-100 chipsets are missing the EHCI-mode (USB 2.0). These systems are working in modern XHCI-mode (USB 3.0) only. Unfortunately, Windows does not support XHCI out of the box. This leads to a missing keyboard/mouse function during installation. The following FAQ will guide you to integrate the correct drivers in your Windows 7 installation.
First you need the following files:
- Windows 7/8.1/10 PC with 10 GB or more free space
- USB flash drive with 8 GB or more free space
- RUFUS (Tool for extracting the ISO file to a USB flash drive)
- Windows 7 ISO file
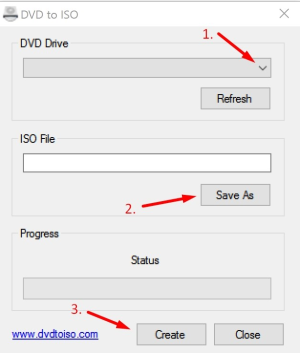
- Start the DVD to ISO programme, select your DVD and select the location where you want to save the ISO file
- Connect the USB flash drive to a USB port and start the downloaded RUFUS-Tool
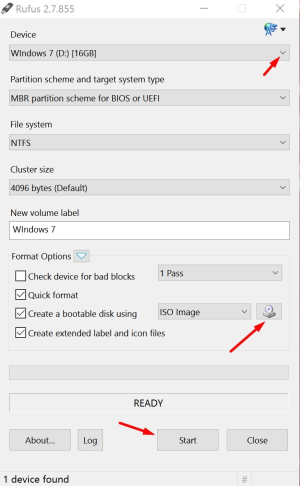
- Check, if the selected USB flash drive is the right one.
- Select the right Windows 7 ISO-File.
- Click Start and wait until the process is complete.
- Start the Shuttle USB-Patcher with a right-click “as Administrator” and press “Next”
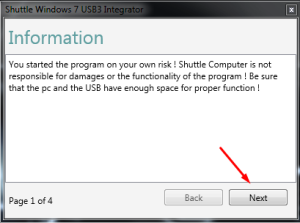
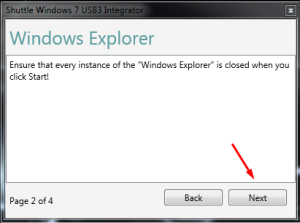
- Close all instances of the Windows explorer and click “Next”
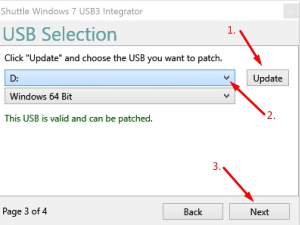
- Click the update button, choose your USB flash drive and press “Next”
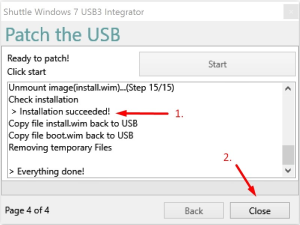
- The last step is to start the process by clicking the “Start” Button. The following process may take some time, please be patient. Once the process is finished, check if the installation has been completed successfully and close the programme.
- Now re-try to install Windows 7.
How to make a bootable USB flash drive?
Warning: Please be sure that there are no other USB devices connected to your system during formatting like external hard disks, external optical devices or other USB flash drives. This ensures that you only format the selected USB flash drive.
- Please download the Rufus tool from https://rufus.akeo.ie/ and extract the file.
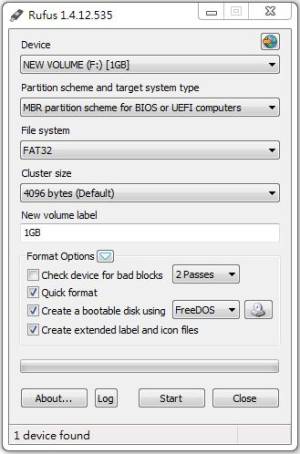
- Please run Rufus.exe.
- Select your USB flash drive, and press the Start button, then confirm the following Warning popup.
How do I update the BIOS version in DOS (Legacy Mode)?
- Please go to the Shuttle download area and download the appropriate BIOS version.
https://global.shuttle.com/support/download - Unpack the ZIP file into an empty folder.
- Copy the subfolder “DOS” to a bootable USB stick with DOS operating system.
- Boot from the USB stick and change to the subfolder “DOS”.
- Execute the FLASH.BAT file.
- The update process starts automatically. The system will reboot automatically.
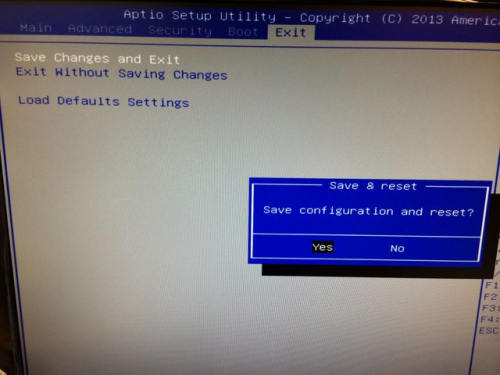
- Once reboot is completed, please enter the BIOS setup program by pressing the “Del” or “F2” key and load the “Default Settings” (F3), then confirm by hitting Save & Exit.
How do I update the BIOS version in UEFI (UEFI Mode)?
- Make sure the BIOS option Secure Boot is disabled.
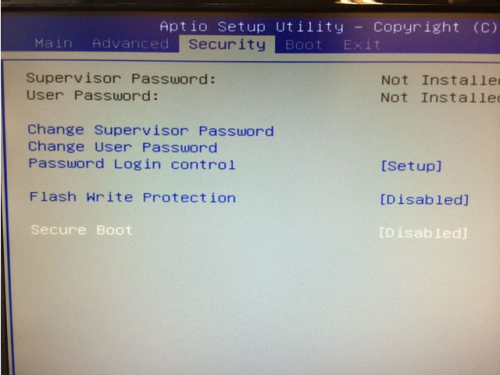
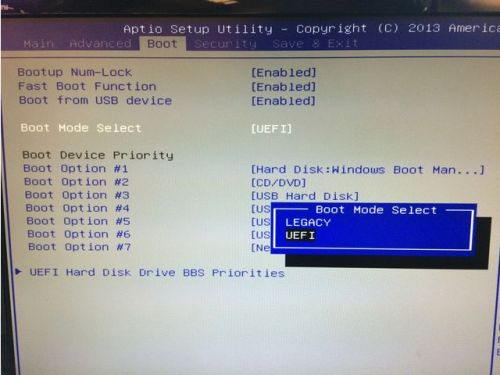
- Change “Boot Mode Select” to UEFI
- Go to the Shuttle download area and download the appropriate BIOS version: https://global.shuttle.com/support/download
- Unpack the ZIP file into an empty folder.
- Copy the subfolders
EFI,SHELLand the filestartup.nshto a USB stick, formatted in FAT32.

- Boot from the USB stick. You may have to press
F7for boot device selection. Pick the USB drive containing the files. - The update will start automatically. The system will reboot afterwards.
- Once reboot is completed, please enter the BIOS setup program by pressing the
DelorF2key and load the “Default Settings” (F3), then confirm by hitting Save & Exit.
