XH270
RAID
Operating a RAID system requires at least two or more storage drives. These work together and form a group of drives. This is also more efficient than one single drive.
RAID systems offer the following advantages:
- Increase reliability (redundancy)
- Increase data transfer rate (performance)
- Structure of large logical drives
- Cost reduction through use of several small, less expensive drives
The XH270 supports the following RAID levels
| Level | Explanation | Pros | Cons | Number of possible hard disks in XH270 | Volume capacity |
|---|---|---|---|---|---|
| RAID 0 | Striping means a mode of operation where data is shared across multiple disks to improve performance. | Increased transfer rate | No protection from loss of data | 2, 3, 4 | Sum of all disk sizes |
| RAID 1 | Writes identical data to both hard disks at the same time. | Provides data redundancy | Only 50% volume capacity | 2 per RAID | Smallest hard disk size |
| RAID 5 | Implemented block-level striping with parity data shared across all included disks makes data redundancy more efficient than RAID 1. | More efficient data redundancy than with RAID 1 | - | 3, 4 | (X*- 1) x (smallest hard drive size) |
| RAID 10 | The combination of RAID 0 and RAID 1 doubles the performance as compared to RAID 1. | Doubles the performance in comparison to RAID 1 | Low total capacity | 4 | (X* / 2) x (smallest hard drive size) |
How to set up a RAID configuration on XH270?
The following requirements must be met before setup.
- The XH270 must be ready for operation with at least two hard disks installed and connected to the SATA ports.
- Boot Mode in BIOS must be set to UEFI.
- Power on the XH270 and while booting please press the
Delkey to enter BIOS.
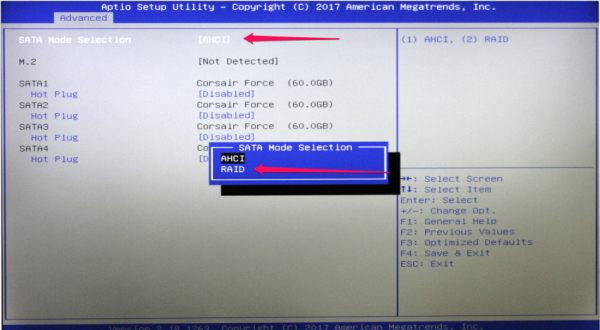
Navigate to the Advanced tab, and enter SATA Configuration.

- Under SATA Mode Selection select RAID.
- Now save your settings by pressing the
F4key on the keyboard and restart the XH270.
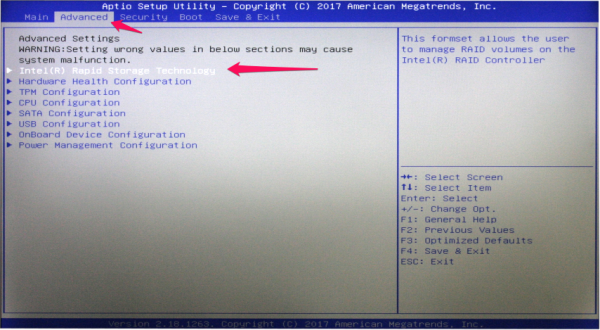
- Now go to the Advanced tab again and enter Intel Rapid Storage Technology.
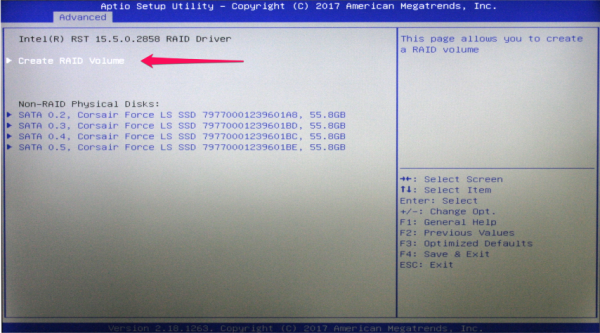
- Click on Create Raid Volume.
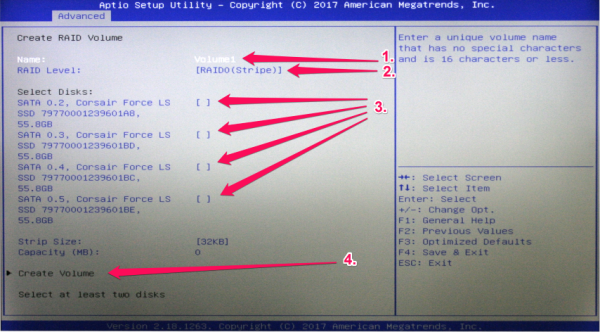
- As the next step, you have the possibility to name the RAID volume (1.).
- Now select a RAID Level (2.). To find out which RAID level is right for you, please refer to the table as above.
- By pressing the space key, you can add the individual hard disks to the RAID volume (3.).
- Finally, please confirm the settings with “Create Volume” (4.).
- To check the RAID settings once again, you can review all information about the created RAID configuration in the next menu or even delete it.
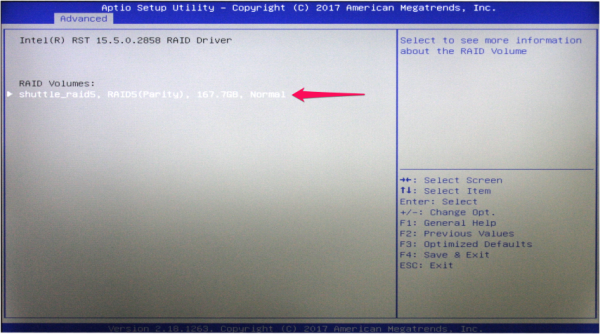
- Now your RAID configuration has been created successfully and an operating system can installed.